 Save
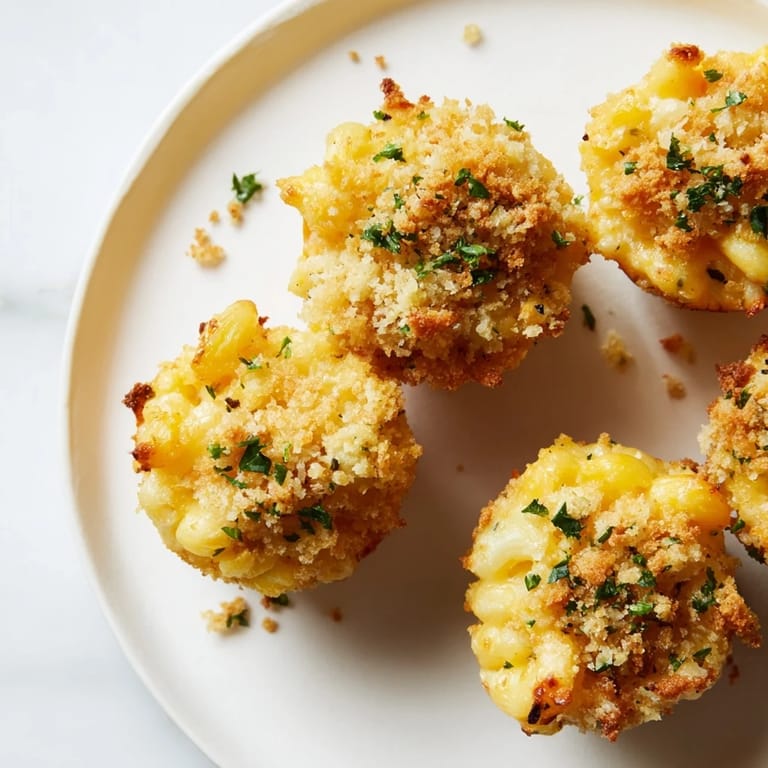
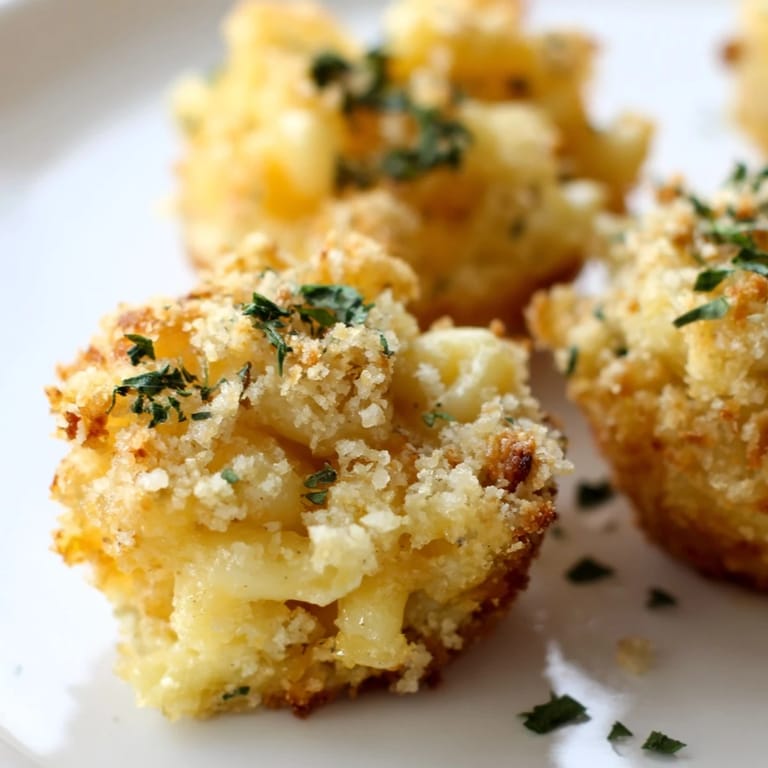
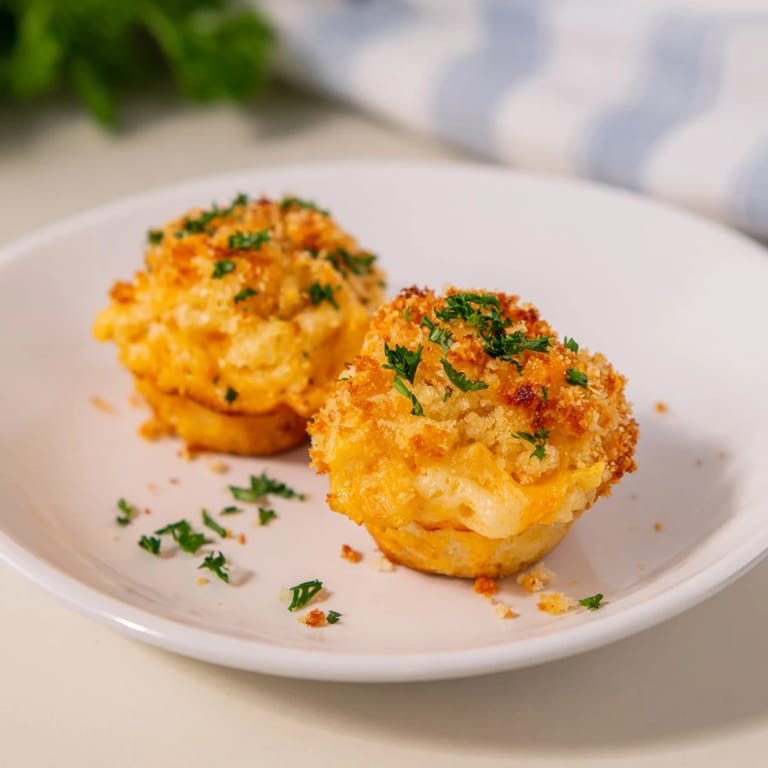
Save The first time I made mac and cheese muffins, I wasn't trying to be clever—I just had half a muffin tin sitting out and a pot of leftover cheese sauce cooling on the stove. It felt wasteful to pour it down the drain, so I spooned the creamy pasta into each cup, topped it with golden breadcrumbs, and slid the tin into the oven. When they came out puffed and bronzed at the edges, I realized I'd stumbled onto something brilliant: all the comfort of classic mac and cheese, but with a crispy crust ratio that made every bite feel like a tiny celebration.
My partner came home to the smell of melting cheddar and toasted breadcrumbs filling the kitchen, and before I could even pull them from the oven, he was hovering over the counter asking what I'd made. When I handed him one still warm enough that the cheese inside was gooey, he ate three in a row without saying much—which is how I knew I'd found something worth making again.
Ingredients
- Elbow macaroni (200 g): Cook it just shy of the package time so it stays tender but doesn't turn mushy when baked in the muffin cups.
- Unsalted butter (2 tbsp for sauce, 1 tbsp melted for topping): The unsalted kind lets you control the salt level and prevents the cheese sauce from tasting one-note.
- All-purpose flour (2 tbsp): This is your thickener, so whisk it in smoothly to avoid lumps that ruin the silky texture.
- Whole milk (240 ml): Don't skip the whole milk for a lighter version—it's what makes the sauce rich enough to cling to every pasta piece.
- Shredded sharp cheddar cheese (100 g): Sharp is the non-negotiable choice here; mild cheddar fades into the background.
- Shredded mozzarella cheese (40 g): Adds stretch and creaminess without overpowering the cheddar flavor.
- Grated Parmesan cheese (40 g for sauce, 2 tbsp for topping): It brings a salty, savory depth that ties everything together.
- Dijon mustard (½ tsp): A tiny amount wakes up the cheese sauce with subtle tang and complexity.
- Garlic powder, onion powder, salt, and black pepper: These quiet background players prevent the dish from tasting one-dimensional.
- Panko breadcrumbs (50 g): Panko stays crispier than regular breadcrumbs and creates those golden, crunchy tops everyone fights over.
- Fresh parsley (1 tbsp, optional): A sprinkle at the end adds color and a whisper of freshness that cuts through the richness.
Tired of Takeout? 🥡
Get 10 meals you can make faster than delivery arrives. Seriously.
One email. No spam. Unsubscribe anytime.
Instructions
- Prep your stage:
- Preheat the oven to 200°C (400°F) and grease your muffin tin thoroughly—butter works better than spray because it clings to every cup. Have all your cheese grated and measured before you start cooking; once the sauce is hot, you won't have time to hunt through the fridge.
- Cook the pasta right:
- Boil the elbow macaroni in generously salted water until it's just barely al dente, about one minute shy of what the box says. This matters because the muffins will bake for another fifteen minutes and you don't want mushy pasta at the end.
- Make the roux:
- Melt butter in a medium saucepan over medium heat, then whisk in flour and cook for exactly one minute, stirring constantly. You're looking for it to smell toasted and nutty, not raw and floury.
- Build the sauce:
- Pour in the milk slowly while whisking constantly—this prevents lumps from forming and is honestly meditative if you let it be. Keep whisking until the sauce thickens enough to coat the back of a spoon, which takes about three to four minutes.
- Add the cheese:
- Pull the pan off heat before adding cheese; if it's too hot, the cheese can break or become grainy. Stir in all three cheeses plus the mustard and seasonings until everything melts into a silky, cohesive sauce.
- Combine and fill:
- Toss the drained pasta with the cheese sauce until every piece is coated, then divide the mixture evenly among your muffin cups. Press down gently with the back of a spoon so the mixture is snug but not compacted.
- Crown with crunch:
- Mix panko breadcrumbs with melted butter and Parmesan, then sprinkle generously over each filled cup. This topping is what transforms them from ordinary to irresistible.
- Bake until golden:
- Bake for fifteen to eighteen minutes until the tops are deep golden brown and the edges are set. The time varies slightly based on your oven, so start checking at the fifteen-minute mark.
- Rest and release:
- Let them cool in the tin for five minutes—this helps them set up enough to lift out without falling apart. Run a thin knife around each edge and gently lift out with a fork or small spatula.
 Save
Save A friend brought her kids over for lunch and set them loose with these muffins, expecting the usual picked-at sides and half-eaten bites. Instead, they each grabbed two and kept coming back for more, and the kids who normally turn their noses up at vegetables suddenly seemed interested in eating whatever mom had on her plate too. That's when I realized these aren't just clever party food—they're the gateway to making anyone eat seconds without complaint.
Storage and Reheating
These keep beautifully for three days in an airtight container in the fridge, and reheating them is almost as easy as making them fresh. Pop them into a 180°C (350°F) oven for about ten minutes and they'll come back to life with crispy tops and creamy, warm centers. You can also freeze them for up to two months before baking, which means you can bake just a few whenever the craving hits.
Flavor Variations to Try
Once you've made the basic version a few times, the fun part is playing with flavors without breaking what makes them work. I've added a pinch of smoked paprika for depth, swapped in Gruyère for a more sophisticated taste, or stirred in crispy bacon bits for people who like a little savory edge. The cheese sauce is forgiving—as long as you keep the ratio of butter, flour, and milk the same, your additions will shine through.
Why This Shape Wins
The muffin tin shape isn't just for show; it actually solves the problem that plagues traditional mac and cheese: the ratio of creamy center to crispy edge never feels right. Here, every single muffin has a golden, crunchy crown because the edges get more heat exposure, and the pasta stays tender inside. They're easier to pick up than a spoon and fork situation, more satisfying than a soft serving, and somehow feel fancier than they have any right to be.
- Make them ahead for stress-free entertaining or weeknight dinners that feel effortless.
- Swap the cheese varieties based on what's in your fridge and what you're in the mood for.
- Serve them warm as a main dish or at room temperature as an unexpected party bite.
 Save
Save These mini muffins have become my go-to for the moments when I need comfort food that's also generous enough to share. They remind me that sometimes the best kitchen discoveries come from not having a plan.
Recipe FAQ
- → What pasta works best for these muffins?
Elbow macaroni is ideal as its shape holds the cheese sauce well and fits perfectly into muffin cups.
- → Can I use different cheeses?
Yes, swapping cheddar for Gruyère or Monterey Jack creates distinct flavors while maintaining creaminess.
- → How do I get a crispy topping?
Sprinkling a mix of panko breadcrumbs and Parmesan on top, then baking until golden, yields a crunchy crust.
- → Can these be prepared ahead of time?
They can be assembled and refrigerated before baking or reheated after baking for convenience.
- → What seasonings enhance the cheese sauce?
Dijon mustard, garlic powder, onion powder, and a pinch of black pepper add depth and balance to the sauce.
- → Are these suitable for vegetarian diets?
Yes, they are vegetarian-friendly using dairy cheeses and staple pantry ingredients without meat.